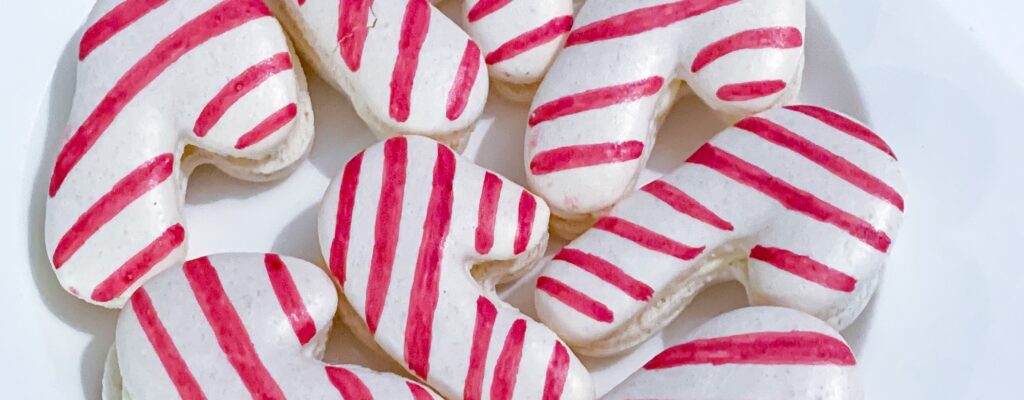
Candy Cane-Shaped Macarons for Christmas
Christmas is a time for family, friends, and of course, delicious treats! This year, why not add a little sparkle to your holiday celebrations with some candy cane-shaped macarons?
They would fit perfectly on the Christmas party table or be the perfect gift for your loved ones. These delicious pastries are a great way to show your family how much you care and are sure to impress.
These cane-shaped macarons are actually quite easy to make at home and if you have baked macarons before, there should not be any surprises. I will walk you through all the steps in-depth and even help you make a template for the special candy cane shape.
You can also make them using only natural ingredients – a food coloring marker for the red stripes can be replaced with the Organic Red Beet Supercolor Powder. Just draw the lines using a thin brush.

Tools and ingredients for making candy cane macaron shells
Tools
- Kitchen scale
- Sifter
- Whisk
- Candy thermometer
- Mixer (stand or hand mixer)
- Small saucepan
- Silicone spatula
- Two large bowls (glass or stainless steel)
- Piping bags
- Silicone mat/parchment paper
- Toothpicks
Ingredients
- 4 oz (115 g) Almond flour
- 4 oz (115 g) Powdered sugar
- 4 oz (115 g) Granulated sugar
- 1 oz (30 ml) water
- 1,7 oz (50 g) Egg whites part 1
- 1,4 oz (40 g) Egg whites part 2
- Red Food Coloring Pen or Organic Red Beet Supercolor Powder and a few drops of water + thin brush
This amount of batter should produce about 30 macarons (60 shells).
I have put together a comprehensive recipe for baking perfect homemade macarons with the Italian method. It goes into detail on every step of the process and should help you increase your success rate! I highly suggest you take the time to read this post thoroughly as well.
Making a template for candy cane macaron shells
Making your own macaron templates is super easy! You just need a transparent silicone mat or baking sheet to use them.
Step 1:
Take a piece of paper or sticky note, using a dark wide pen, draw the lines of a candy cane and add the number one on the corner.


Step 2:
Turn the same paper around, and if you used a dark-colored marker, you will see the lines of the candy cane number one you drew before. Now, draw another candy cane shape following the lines you see through the paper. Add number 2 to the corner.
Why do you need the templates in the opposite way? Because you need to make the upper and bottom shells for the macarons that need to match. To stick two shells together perfectly, you will need two different templates.


Piping the candy cane macaron batter
Put the batter into the piping bag and let the fun begin! To start with, place the template below the silicone mat or baking sheet. You should be able to see the lines you drew earlier clearly.
Pipe the macaron’s batter onto the parchment paper or silicone mat following your template. Just keep in mind, that the batter will spread a little after being piped. Therefore draw a little thinner line than you actually want it to be.


I recommend you do a few candy canes at the time. Start with the number one template and then change the template after piping out a few. By doing this, you can make sure you get the same amount of candy canes each way.


Baking the candy cane macaron shells
Once the macaron batter is piped out to the mats, it is time for baking. If you are a beginner and don’t have much experience making macarons, I recommend waiting for a little before butting the macarons into the oven.
You should wait about 30 minutes until you see your macarons form a slight skin and turn matte-like. If the macaron batter is not perfectly made, the drying will help them to turn out well!
Turn on the oven. I am using the convection oven on fan mode. Set the temperature to the 250°F (120°C). Bake each sheet for 20 minutes. As every oven is different, you may need to bake them a few minutes less or more! You will learn over time!
Once the macarons are done baking, remove them from the oven and slide them to the table or cabinet. Do not let the macarons stay on the hot baking pan – the pan is still hot and the macarons will continue to bake. In most cases, they will over-bake.
Let the macarons cool down, and then pair the macarons! Find the perfect partner for each macaron shell and try sandwiching them together. Using a red food coloring pen, draw the stripes on each upper candy cane macaron shell!
Be gentle and do not push too hard as you can break the shell by doing that.
Let the macarons completely cool down before removing them from the mat.


TIP: Sometimes it is hard to get the macarons off the silicone baking mat as they tend to stick to the mat. In that case, I recommend putting the silicone mat with the macarons into the freezer! Wait around 30 minutes and take them out. Remove the macarons fast from the silicone mat before they start to warm up. With the help of your fingers, gently press on the bottom of the silicone mat to help the macarons get off.
Filling for candy cane macarons
Now it is time to make the filling! For candy cane-shaped macarons, the perfect flavor is obviously a peppermint-flavored cream!
This LorAnn Peppermint Oil is my personal favorite product to add the mint taste to the desserts!
It is really the best thing ever! It has a very pleasing fresh and sweet peppermint taste with an even better smell. Many other similar products are great as well but sometimes they feel too strong and have a bitter taste.
I love this one mainly because of the sweet-sweet peppermint taste, like the white Orbit! It comes in a teeny-tiny bottle, but is very concentrated and you only need a few drops to get the taste! This small bottle will last for a long time.
For the filling, I really like a simple peppermint-flavored cream! It is so easy to make, tastes amazing, and fits well with the cute candy cane macarons. Perfect for Christmas time.

Ingredients for peppermint macaron filling
- 7 oz (200 g) butter (room temperature)
- 3 oz (85 g) cream cheese (room temperature)
- 7 oz (200 g) powdered sugar
- A few drops of LorAnn Peppermint Flavor
How to make filling for candy cane macarons
- Let the 3 oz (85 g) cream cheese and 7 oz (200 g) butter sit in a room as long as they reach the same temperature.
- Once softened, place 3 oz (85 g) of cream cheese and 7 oz (200 g) of butter into the bowl and start whisking using a mixer. Slowly add 7 oz (200 g) of powdered sugar. Mix on high speed until it turns fluffy and even. It takes around 3 minutes to achieve the perfect texture.
- Add a few drops of peppermint flavor to the mixture and mix for 30 seconds. Crab a toothpick or a spoon to taste the filling. Add more flavor if needed and repeat mixing.
- Take the piping bag and place the filling into the bag.
Filling the candy cane macarons
You are doing well! Just a few more steps and your macarons are done! The filling part is so much fun and it is nearly impossible to fail here.
As you already found the partners for each macaron shell, now remove the upper shell and place the peppermint cream on the bottom shell. Do not fill the entire shell – leave a little room to the edges as when you push two shells together, the filling will spread a little.


How to store candy cane macarons
Let the macarons mature for a few hours if possible, or feel free to serve them right away – they still taste great!
Macarons last at least about one week. Just remember to put them in an airtight container in the fridge.
I have made multiple posts on how to make cute Christmas-themed macarons – feel free to check them out as well! I Wish You a Happy and Sweet holiday!

Enjoy your macarons!
Belli xx