Perfect Homemade Macarons (Italian Method) recipe
This is a step-by-step beginner’s guide on how to make perfect homemade macarons. And by that being said I really mean step-by-step: every move is described, you will find a lot of pictures along with video gifs from the most important steps, and all the ingredients are measured very accurately.
You can not find “add two egg whites” in this recipe. Accuracy is the key to making macarons and that’s what you get from here.

In this recipe, I’m making macarons in an Italian method. This is the recipe I have been using for over five years. I have made thousands of macarons following the exact recipe and have been teaching it in numerous macaron baking classes.
This is the recipe I am proud of and I really hope you will find it helpful! It contains a lot of progress pictures, success tips, a list of tools, and ingredients used.
As the recipe is very thorough, I suggest you take your time, be careful and take it slow while following all the steps. Do not hurry, enjoy the progress and you are very welcome to ask questions in the comments.
Tools for making the macarons
- Kitchen scale
- Sifter
- Whisk
- Digital Candy thermometer
- Mixer (stand or hand mixer)
- Small saucepan
- Silicone spatula
- Two large bowls (glass or stainless steel)
- Piping bags
- Silicone mat/parchment paper
- Toothpicks (you can do it without the toothpicks, but they are very helpful during the process)
Ingredients for macaron shells
- 4 oz (115 g) Almond flour
- 4 oz (115 g) Powdered sugar
- 4 oz (115 g) Granulated sugar
- 1 oz (30 ml) water
- 1,7 oz (50 g) Egg whites part 1
- 1,4 oz (40 g) Egg whites part 2
- A tiny bit of food coloring (optional)
You get 30-40 macarons (60-80 shells) from this amount of batter.

Preparations before baking macarons
- Clean the mixer, mixing bowls, whisks, and spatulas with lemon juice or vinegar. It helps to get rid of all the possible residue. Do not use plastic bowls, because they have a porous surface and hold onto oils. An oily bowl can ruin your macaron batter
- Take the eggs out of the fridge and let them stay at room temperature for a few hours
- Weigh all the ingredients so you can focus on baking later
Making the batter for macarons
Step 1:
Take a large glass or stainless steel bowl and put it on the kitchen scale. Start sifting 4 oz (115 g) almond flour and 4 oz (115 g) powdered sugar in there. After that, take a whisk and mix until everything is even.

Step 2:
Add 1,4 oz (40 g) egg whites to the almond flour-powdered sugar mixture and set the bowl aside.

Step 3:
Take a small saucepan and add 1 oz (30 ml) water + 4 oz (115 g) granulated sugar. Set the saucepan to the stove and turn on the low-medium heat. Stick the digital candy thermometer in there. You do not have to mix it, just let it be. It will be the famous sugar syrup once ready.

Step 4:
Add 1,7 oz (50 g) egg whites to the stainless steel mixing bowl, and set aside.

Step 5:
Patiently wait until the candy thermometer in the sugar syrup shows 230°F (110°C). If that temperature has been reached, turn on the mixer at medium speed and continue to wait for the sugar syrup to heat up.
Step 6:
Keep an eye on the candy thermometer and once it gets to 244°F (118°C) remove the saucepan from the heat and slowly pour the hot sugar syrup into the egg whites foam. At this point, you need to whisk the egg whites at the same time as gently pouring the sugar syrup into the foam.
It can be tricky when using the hand mixer. Tricky, but totally doable. Using the stand mixer is much easier. Make sure you scrape the edges of the saucepan with a spatula to get as much sugar syrup to the egg whites as possible.

Step 7:
Once all the sugar syrup is in the egg whites, keep the mixer on medium speed and whip for 5 minutes and then 2 minutes on high speed. It can take a little more time when using a hand mixer. The meringue should look strong and shiny.


Step 8:
Take the other bowl you sat aside before including the almond flour, powdered sugar, and egg whites. Fold the mixture with the silicone spatula until nice and even.


Step 9:
Once the meringue is done, add ⅓ of it to the almond-sugar-egg mass you just folded together.

Step 10:
This part is called macaronage. One of the trickiest parts of making macarons. Take your time, focus, and be slow. You don’t want to overmix, because you can’t do anything to save the overmixed batter. Slowly and gently fold the batter until even.
Step 11:
Now it is time to add the second ⅓ of the meringue to the batter. You can also add a tiny bit of food coloring at this point. I like to use a toothpick to add it. Make sure you are not adding liquid food coloring straight to the batter as it can ruin it.
I recommend using gel food coloring. Read more on how to correctly use gel food coloring here: Colorful Macaron Shells with Gel Food Coloring.

Step 12:
You will feel and see how the batter looks more and more smooth and flowy after each fold. Scrape the edges of the bowl to get all the mixture even. Remember – be slow and gentle, and do not hurry.

Step 14:
Finally. add the last part of the meringue and slowly fold until ready. The macaron batter will be ready very quickly. Be careful not to overmix. The batter is ready once it looks like a ribbon when you lift the spatula up. It will smoothly flow back to the bowl and you can write the number eight with a batter ribbon without it breaking.

Below is an example, of how to fold the batter properly. The gif is making it a lot faster than it actually should be. Remember -the slower you fold it, the better!

This is the ribbon test – you should be able to write the number 8 with the batter without the batter breaking. Again – the gif version makes it a lot faster than it should be done.

Piping and baking the macaron shells
Step 1:
Place the meringue in the piping bag as shown in the picture below. You can use the round tip for piping, but you can also do it without it.


Step 2:
Turn on the oven. I am using the convection oven and fan mode. Set the temperature to the 250°F (120°C). In case your oven does not have a fan mode, you probably need to raise the temperature by 60°F (15°C). Remember – every oven is different. What works great for me, might not work for you.
Step 3:
Pipe macarons to the parchment paper or silicone mat at a 90-degree angle directly straight from the top to the bottom.

Step 4:
If you use the silicone mat with the little template rounds in it as seen in my pictures, then you should pay attention to the following tips to make piping macarons easier and in the end get better results.
Tips for piping macarons on the silicone mat
- Pipe the macaron batter at a 90-degree angle directly straight from the top to the bottom
- Do not pipe too much – once the batter is on the mat, it will spread. Start piping only a few macarons at first to see how much the batter fill flows away. After that, you can make corrections to add less or more for the next macarons. Remember – you can always add more, but it is difficult to remove the redundant batter
- Piping too much batter can cause a huge mess – it can spread over the template and flow together with other piped macarons. Take a look at the picture below

Tip: Do not fill all the templates with the batter. You should let approximately 1/8 inch space (around 5mm) to the edges. Wait 30 – 60 seconds and if the batter has not touched the template edge, crab for a basic toothpick. Stick the toothpick into the batter and help it through the edge (see the video below). Macarons will look the best when the batter is piped into the template evenly from one edge to the other as you see below.

Step 5:
You may notice small air bubbles. Nothing to worry about – just gently stab the bubbles with a toothpick and they will disappear.


Step 6:
Resting the macarons – I personally do not rest my macarons that are made using the Italian method. I recommend letting one batch rest and at the same time putting the other one straight in the oven without resting.
By experimenting with the rest time, you will find out what works best for you. Resting macarons means letting the macarons dry before putting them into the oven. It takes around 30 minutes – just let them lay on the table for a little bit. You will see a light skin developing on the macaron shells and it turns matte looking.


Step 7:
Bake the macarons in the oven on the middle rack at 240°F (115°C) for 20 minutes.
Step 8:
Take the macarons out of the oven and gently remove the parchment paper or silicone mat from the pan. It is important to do so because the pan is hot and keeps baking the macarons even when removed from the oven.
Step 9:
Let the macarons cool down before removing them from the parchment paper or silicone mat.

Making the filling for macarons
Start making the filling for macarons. In this recipe, I will share the easy vanilla-flavored filling, but feel free to choose the flavor you like.
Ingredients for the filling
- 7 oz (200 g) soft butter
- 7 oz (200 g) powdered sugar
- 3 oz (85 g) cream cheese
- Few drops of vanilla extract
- Food color (optional)
Step 1:
Mix 7 oz (200 g) of soft butter using a mixer at medium speed.

Step 2:
Slowly start adding 7 oz (200 g) of powdered sugar once the butter is starting to look lighter and fluffier. Be careful while adding it! Turn the mixer on low speed to avoid the big white sugar cloud over the mixing bowl.
Step 3:
Once all the sugar is in the butter, add vanilla extract and mix for around 1 minute at high speed. Then lower the speed to medium.

Step 4:
Add 3 oz (85 g) cream cheese (at room temperature) and mix at medium speed until even. Feel free to add food coloring if needed. I added a tiny bit of pink gel food coloring to get the tone I like.

Step 5:
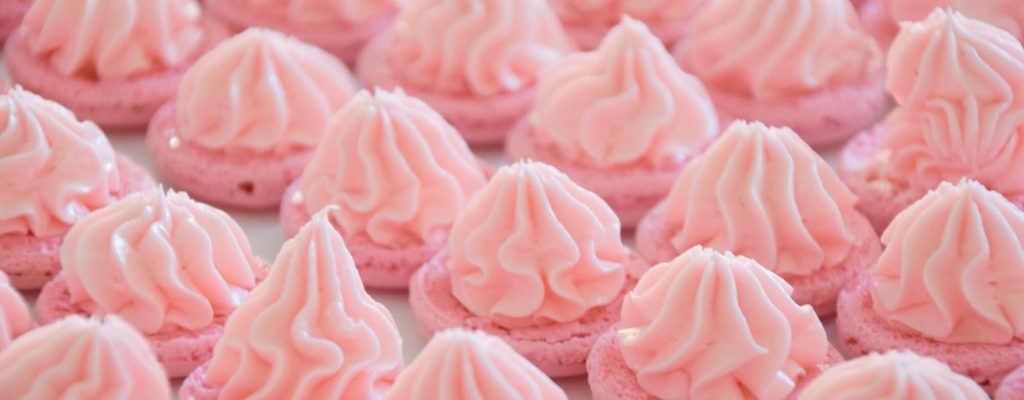
Once the filling is ready, put it in the piping bag. You can use the usual basic round tip, but you are perfectly fine without one. I don’t use a piping tip for my usual fillings, but when I want my macarons to look a little extra, I love using this Closed Star Piping Tip:


Step 6:
By that time your macarons have cooled down, you can start peeling them from the parchment paper or silicone mat.
Step 7:
The best way to do that is to gently press the macarons with your finger from the other side of the parchment paper or silicone mat. Make sure the macarons are completely cooled down before doing it.
Take a large plate or tray and set the macarons on it in pairs – one shell bottom-up and the other one bottom-down. Do it with all the shells.

Step 8:
Start piping the filling to the macarons that are set bottom–up. Pipe the filling to the shell’s bottom like you piped the macaron batter – at a 90-degree angle directly from the top to the bottom. See above for tips.
I recommend you try to use a small amount of filling at first. Slowly press the macaron shells together and you will see if you need more or not. If you use too much filling, then it will spread out after the shells are sandwiched together. You can always remove one shell and add more filling when needed.

Step 9:
Place the sandwiched macarons in an airtight container and let them mature for 2-24 hours. After that, they are ready to be eaten.
You can decide whether you want to store your handmade macarons for later or to eat them right away. Macarons can be stored in the fridge in an airtight container for at least 7 days.
Enjoy your macarons!
Belli xx